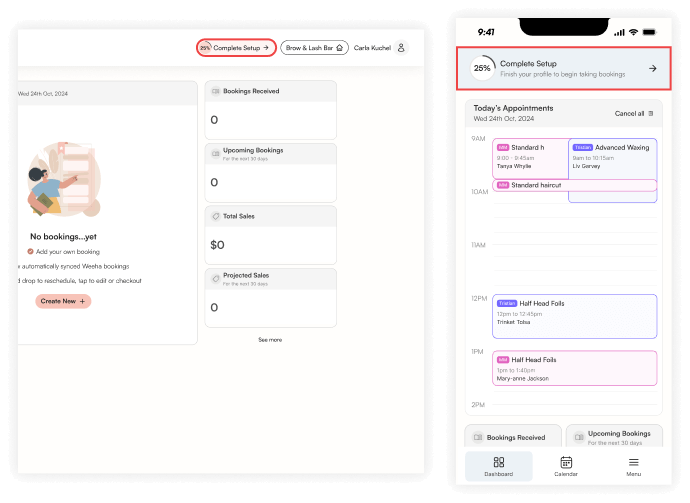
Once your account has been created, there are several tasks to complete in order to set up your account so that clients can make bookings with you, and you can take payments.
The Complete Setup button at the top right of the navbar on desktop, and displayed as a banner on the Dashboard tab on mobile, is where you can find this list of tasks and check them off.

Only once you have completed all the required tasks in this setup will your business appear on the Weeha Map, and you will be able to take bookings and receive payments.
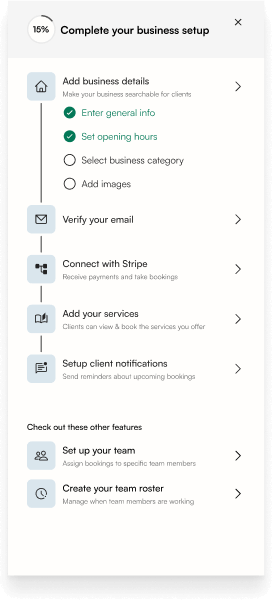
The Complete Setup menu includes the following steps:

Add Business Details
Adding these details will make your business visible on the Weeha Map and allow clients to book appointments with you.
See the following articles on how to complete these tasks:
- Set General Business Information
- Add Business Opening Hours
Verify Your Email
After you create an account, to prove your authenticity (and not a computer bot), you will receive an email with a six-digit authentication code.
To verify your email, enter this code. If you didn’t receive a code, check your junk mail or click the Send Again link as shown below.

Connect with Stripe
Connect with Stripe to set up your business to receive payments, provide refunds, and send text message notifications.
See this article on how to Connect to Stripe.
Add Your Services
In order for clients to make bookings, add all of the services and events that you offer.
See this article on how to Add a Service.
Setup Client Notifications
Send text message notifications to your clients regarding their bookings (e.g., canceled, updated, or new bookings).
See this article on how to Set Up Text Message Notifications.
Some other important tasks to complete are:
Setting up Your Team
In order to assign team members to bookings, add your team members and assign the services they can perform.
See this article on how to Add a New Team Member.
Creating your Team Roster
Create and manage rosters for each of your team members.
See this article on how to Add a New Roster.