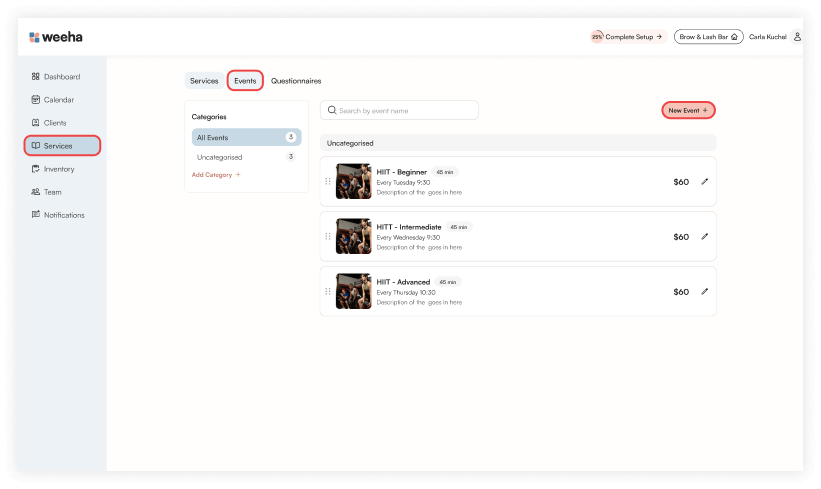
To add a new event, click Services in the left-hand side menu. Ensure that the Events tab is selected at the top.
Here is where you will see all of your current events listed.
Click New Event + button in the upper right corner of the screen.

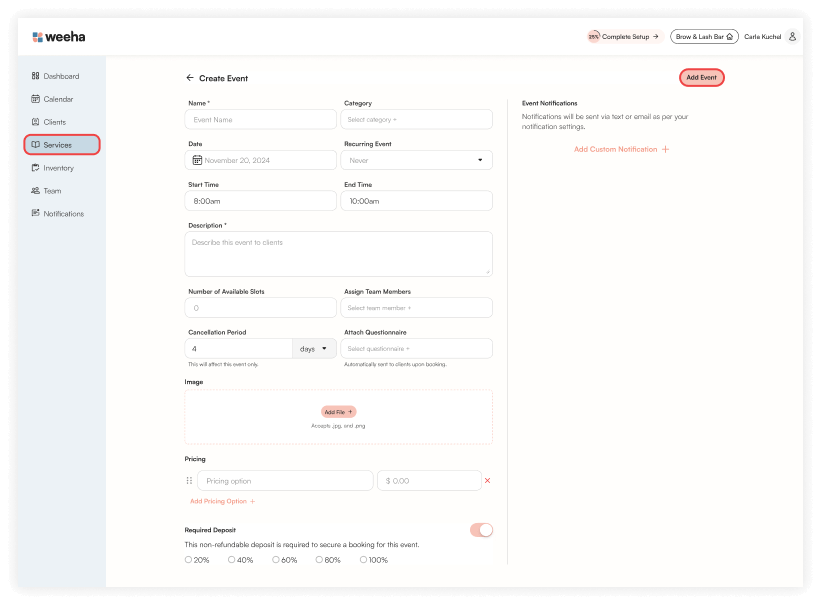
Enter all of your event information:
- Event Title
- Event Category (to learn more about categories, read this article)
- Date of Event including Start and End times
- Recurring event - Select whether this event is recurring and at what intervals
- Event Description
- Number of Slots Available - Specify the number of available slots for this event.
- Assign Team Members - Select all team members that should be assigned to this event whenever it occurs.
- Cancellation Period - See below for more information about this.
- Attach Questionnaire - See below for more information about this.
- Event Image
- Pricing - See below for more information about this.
- Required Deposit - See below for more information about this.

Once all information has been entered, click Add Event in the upper right corner.
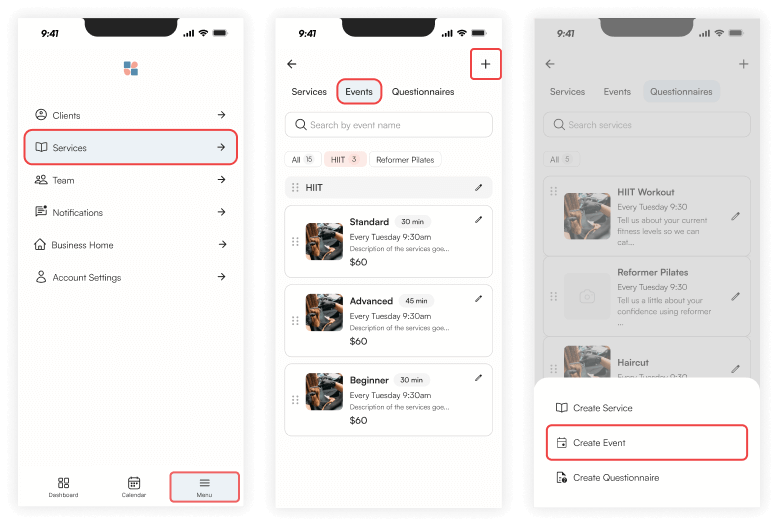
For Mobile
For mobile, click Menu > Services > + (icon in the top right).
Select Create Event from the pop-up menu.

Event Cancellation Period
If you wish to, set a cancellation period for this event.
If you have a cancellation period set for your business it will apply to any event you create. If you adjust the cancellation period it will affect this event and any recurring instances only.
Attach Questionnaire
If you have created a questionnaire for this event, you can select and attach it. To learn more about questionnaires and how they work, see this article.
Event Image
Add an image for this event. Adding images allows clients to visualise the event you are running. To learn how to add and edit images, see this article.
Required Deposit
Toggle the button on or off to specify the % deposit that is required to secure a booking for this event. Deposits will be refundable unless they are cancelled within the set cancellation period.
Pricing Options
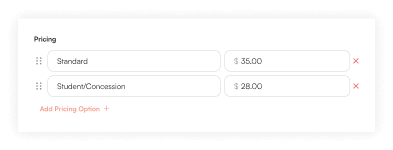
You can add multiple pricing options for events, for example, if you wish to charge different amounts for adults and students. Click Add Pricing Option + and it's amount. To remove an option, click the x on the right hand side of the row.

To change the order in which your pricing options appear to clients, drag and drop each row to the desired location using the drag icon on the left hand side of the row.
Event Notifications
Event notifications are sent to clients as per your notifications settings. You can read more about your notifications settings in this article.
Click the Add Custom Notification +
-pop-up.png)
Event notifications are sent via push notification, email or text. Text message notifications at charged at $0.07 per text.